We're wine drinkers around here. Sometimes we get good wine and we savor it; sometimes we get not so good wine and we dump it! Either way we end up with a lot of empties. I was using them for decorations until I started running out of cabinet space!
I love glass arts; I had a brief attempt at doing stained glass comic book heroes, but for a beginner Spider-Man has a lot of curves! I kept all my materials though because I knew they would come in handy someday. I'm fascinated by slumped glass and fire polished glass (check out this
AWESOME Etsy shop for upcycled glass) and would love to learn to work with it, but alas a
kiln
is out of my budget right now. I had seen some wind chimes done with slumped bottles but I wasn't fond of how they looked and since I didn't have the kiln the method was out anyway. But after a vacation to Napa and Sonoma last year
I wanted to do something crafty with our bottles so I started chewing on ways to make the windchime and came up with these.
Once I started on the windchimes, my friends started scoping out cool bottles for me. My friend Steff went dumpster diving for the cool blue wine bottle and the Skyy vodka bottle (I think it will become a lantern)!
There are several ways to cut a bottle; many use those 70's bottle cutters, some people use acetone on a string, some use candles, but I found
this tutorial on Instructables and since I already had a
tile saw
, I went with it! I would like to try the bottle cutter method but I can't see spending $25 for one. The pros of the bottle cutter are that you get a really clean cut; the cons are that you lose a lot of bottles if it doesn't break perfectly. If I come across a cheap one at a yard sale, I'll definitely pick it up and give it a try, though. The pros with the tile saw (for me) are that it's quick and it rarely breaks a bottle, also I use the
punt (the little bump in the bottom of the wine bottle) as the "clanger" for the wind chime and I haven't been able to figure out any other way to cut it off.
The cons are that the cuts aren't that clean and I end up having to grind the glass (fortunately I have a grinder on hand). I would love to be able to fire polish the edges, but that requires a kiln which we already know the story with that. For now, they'll just have to be "rustic".
The first step in the process is to wash your glass. I've found through trial and error that it's a lot easier to get the labels off before you cut the glass than after. I still haven't perfected the method, but this time around I soaked them in hot water for 5 - 10 minutes and then used a razor blade to scrape off the labels.
I would love to leave the labels on, but since I use a wet saw to cut the bottles they don't really stay intact. (Any suggestions for preserving them?) I still end up with adhesive left on some of the bottles and end up cleaning them up with
GooGone
; I'd rather not use it but I haven't found anything better.
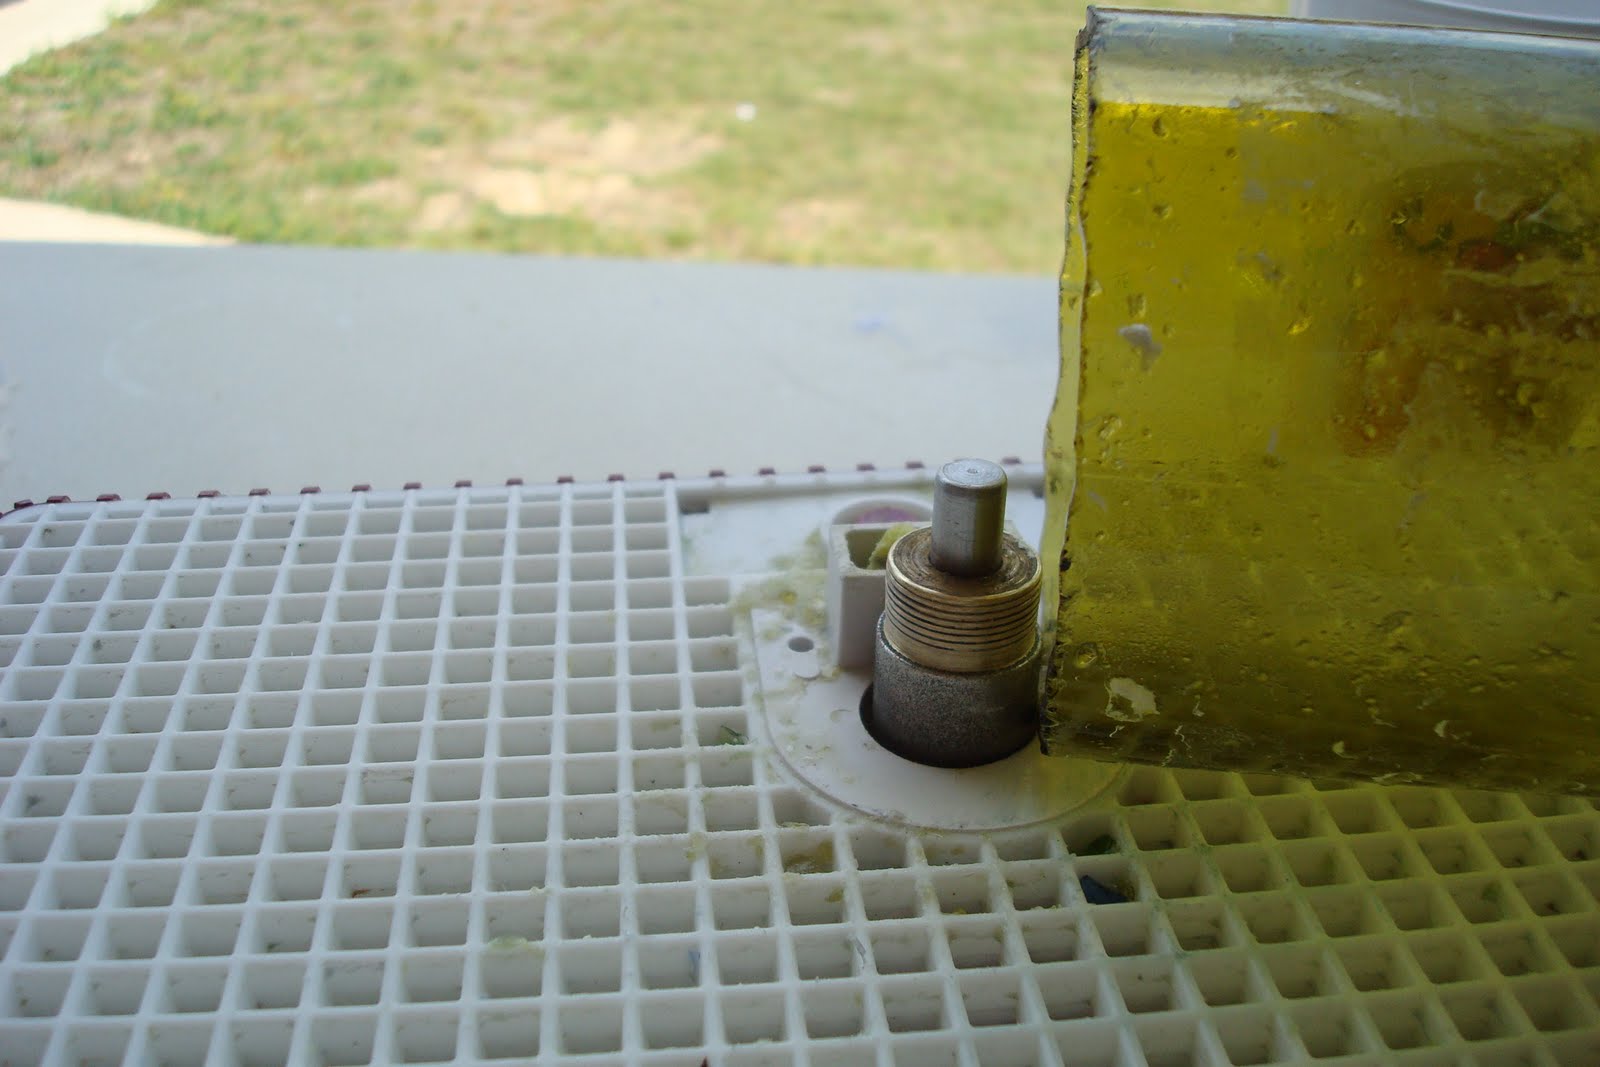
Now you're ready for the power tools! I cut the bottoms and the punts off with the wet tile saw. Make sure you have eye protection!!!!! (Also, earplugs and a respirator wouldn't hurt. Although the saw and grinder use water, silica dust in your lungs is a BAD thing!)
I also wear a plastic apron because chips of glass fly everywhere! I usually separate the bottle from the bottom, then run the bottom through again (very carefully) to remove the punt. Some bottles have smaller punts and this can be tricky. You'll be surprised at how messy this is so I always try to do it outside. I used to set up on the back patio but even after sweeping there would be glass chips left all over the place and that's not good for puppy paws!
As I mentioned before, the tile saw does not make the cleanest cuts so you have to fix that with a
glass grinder
. This is probably my least favorite part because it takes some time and I am very impatient! I grind the punt - standing up to remove burs and then flat around the edges:
I grind the inside ring of the bottom where the punt was and then stand it up on its side and go around the edge:
Finally I grind the bottle itself. I try to smooth out the cut as much as possible, this way no one gets hurt!
Every bottle cuts differently (I find that the thicker the glass, the cleaner the cut), so you need to take your time grinding. Run your finger around all of the exposed edges. They won't be perfectly smooth, but no one's going to be licking these (hopefully!) so as long as your finger comes out okay, you're good to go! (Have the band-aids handy, just in case. HA!)
After I grind, I usually clean the bottles. Just rinsing them doesn't get all the gook off so it takes a couple of rounds. First I rinse them off outside with the hose and try to get the glass chips off.
(They're so beautiful in the sun!)
I will also take them into the sink and put them in warm soapy water, but I don't want the big chunks of glass going down my disposal. I use a baby bottle scrubber to get the inside of the bottle clean.
Some tips: I put each complete bottle (bottle, bottom, and punt) in a grocery bag to keep them together and protect them a little.
(It's also nice to have a wine box with dividers around!)
There's one more glass cutting step, and that's drilling some holes with a diamond bit on my Dremel. I'll pick up with that on the next post and we'll start assembling! In the meantime, chugalug pooh bear! Go get some vino and get to work!
Georgia Wine Festival 2009
(at some point I think I had a glass in both hands)


I think I will leave the glass cutting to you!
ReplyDeletesuper nice! i gotta get to wine country so i can get some practice. what a wonderfully cute and green idea!
ReplyDeleteTry putting press and seal wrap over the labels before you cut them...
ReplyDeleteI am the proud owner of one of these beautiful wind chimes...For all of you who don't have one,
Nanny Nanny Boo Boo!! (I'm mean like that!)
Len - it's so beautiful! If I had the means I'd be kicking back there right now!
ReplyDeleteStacie - Thanks for the tip! I'll give it a try.
ReplyDeleteI haven't tried it yet, but I've read that "Straight-A" is great for getting labels off. It is supposed to be available at wine/beer making shops. The article said it makes removing those sticky labels a snap.
ReplyDelete